Automate Document Signing using the DocuSign API
Adam Yue
Feb. 27, 2021
/
Whilst Kubernetes is increasingly the most widely used orchestration platform there is still a huge lack of enterprise solutions for large-scale companies whose main priorities are security and durability over portability and flexibility.
That is where Red Hat OpenShift comes in, and here are three reasons why:
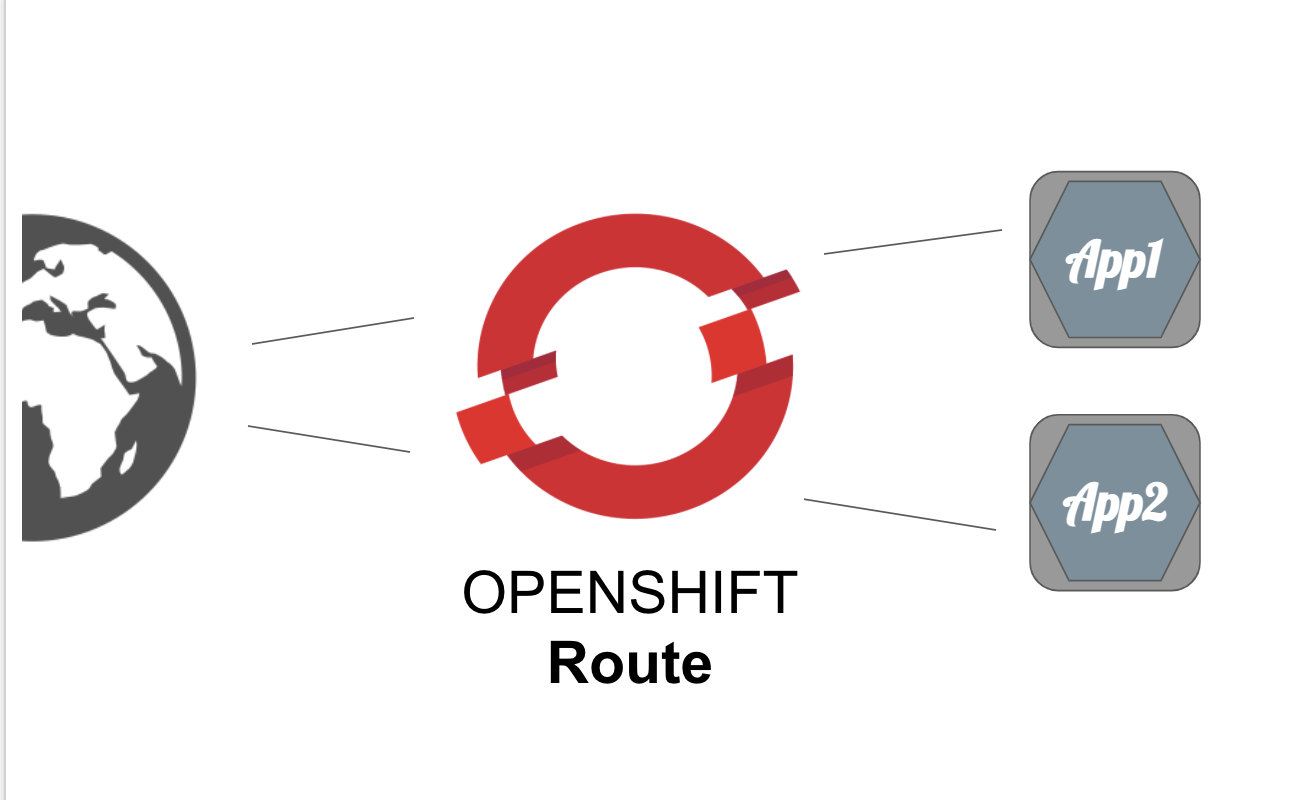
OpenShift integrates some useful features, such as Prometheus, Grafana, and Ingress (also called Route in Openshift). These components are required to maintain the enterprise-level platform, while Kubernetes needs to set up these add-ons manually.
OpenShift has stricter security policies than Kubernetes. For example, it is straightforward for people to deploy an application that runs a container as root on Kubernetes, but the security policies of OpenShift restrict them to do so. With the policies of OpenShift, users have no choice but to learn the security policies to deploy their applications.
OpenShift provides a web-based User Interface (UI) to visualize nodes, projects, and cluster resources so that cluster administrators can manage clusters more effectively. Besides that, the web console has a login page. It is much easier for users to access the cluster and start their containers journey.
CodeReady Containers require the following minimum system resources to run Red Hat OpenShift:
You will also require a native hypervisor for your host operating system. CodeReady Containers currently supports libvirt for Linux, HyperKit for macOS, and Hyper-V for Windows.
Step 1. Install hyperkit
$ brew install hyperkit
$ brew link --overwrite hyperkit
Step 2. Download CodeReady Containers
Download CodeReady Containers archive from the Red Hat CodeReady Containers product page
Step 3. Extract the CodeReady Containers archive for your operating system and place the binary in your $PATH
$ cp crc /usr/local/bin/
Step 4. Setup cluster
Once the CodeReady Container has been installed, set up your host environment with the crc setupcommand. This command must be run before starting the OpenShift cluster.
Step 5. Start your OpenShift 4.x cluster
After your host environment has been set up with the crc setup command, you can start the OpenShift cluster with the crc start command.
When prompted, supply your user pull secret for the cluster. Your user pull secret can be copied or downloaded from the Red Hat CodeReady Containers product page under the Pull Secret section. A Red Hat account is required to access the user pull secret.
After the start process has finished, it will show the user credentials that you can later use to login in OpenShift

Step 6. Using your cluster
To access the cluster, first set up your environment by following the crc oc-env instructions.
$ crc oc-env
export PATH="/Users/brandon/.crc/bin/oc:$PATH"
# Run this command to configure your shell:
# eval $(crc oc-env)
Login to OpenShift as a developer
$ oc login -u developer -p developer https://api.crc.testing:6443
Login successful.

You don't have any projects. You can try to create a new project, by running

    oc new-project <projectname>
Create your first project/namespace.
$ oc new-project myproject
Note:
- A
projectis a Kubernetesnamespacewith additional annotations and is the central vehicle which manages access to resources for regular users.- Unlike Kubernetes, a normal user cannot create pods in the default project/namespace. You must create the first project before applying the new pod.
List all projects/namespaces
$ oc projects
You have one project on this server: "myproject".

Using project "myproject" on server "https://api.crc.testing:6443".
In Kubernetes, you need to install the plugin kubens to switch between namespaces. However, this is a built-in feature in OpenShift, you just need to run oc project <my-project>.
$ oc project myproject
Already on project "myproject" on server "https://api.crc.testing:6443".
Step 7. Access the Web Console
You can now run crc console and use these credentials to access the OpenShift web console.
Login as "Developer"
Choose "htpasswd_provider"

Input developer password

Check the Web console for the developer

Login as "kubeadmin"
Choose "kube:admin"

Input admin password

Check the Web console for administrators

Step 8. Stop cluster
$ crc stop
Step 9. Check the cluster status
$ crc status
CRC VM:          Stopped
OpenShift:       Stopped
Disk Usage:      0B of 0B (Inside the CRC VM)
Cache Usage:     13.05GB
Cache Directory: /Users/brandon/.crc/cache
Since Kubernetes forms the base of OpenShift, one can find a lot of common aspects between the two. While Kubernetes takes care of automating application operations and provides the flexibility for cluster configuration, OpenShift covers enterprise needs.
Darumatic has solid experience in setting up OpenShift clusters in private environments and helps customers to get their foot in the door of Kubernetes. To learn more about OpenShift and Kubernetes, please feel free to contact us or follow us on Linkedin.

Felix Schmitz
Brandon Tsai

Heiner Gamboa

Brandon Tsai
Brandon Tsai

Adrián Deccico
Brandon Tsai
Address
Level 8
11-17 York Street
Sydney NSW 2000
Phone Number
+61 2 8294 8067
Email
[email protected]
By Adam Yue
By Felix Schmitz
© 2017-2024 Darumatic Pty Ltd. All Rights Reserved.